
RV Refrigerator Not Cooling? What to Check Before Calling for Service

An RV refrigerator that stops cooling does not always need a major repair. A tripped breaker, blocked vent, poor door seal, low battery voltage, or incorrect operating mode can produce similar symptoms. The safest way to narrow down the problem is to identify the refrigerator type, record what it is doing, and work through the owner-safe checks in a logical order.

Start with the appliance manual: RV refrigerators vary by model and may use LP gas, 120-volt AC power, 12-volt DC power, or a compressor. Follow the instructions and fault codes for your specific refrigerator. Do not remove electrical covers, disconnect gas fittings, or work around a burner unless you are qualified to do so.

First, identify the refrigerator type

Many traditional RV refrigerators use an absorption cooling system. Depending on the model, they may operate on LP gas, 120-volt shore power, or 12-volt power. Absorption refrigerators depend on heat, ventilation, and gravity to circulate the cooling solution, so the trailer’s position matters while it is parked.

Other RVs use 12-volt compressor refrigerators. These work more like residential refrigerators and do not have the same leveling requirement, but they still depend on adequate battery voltage, ventilation, and airflow inside the cabinet.

Check the model number and owner’s manual before applying advice intended for a different refrigerator design.

Confirm the temperature with a thermometer

Do not judge cooling performance by touching a shelf or cooling fin. Place an appliance thermometer in the refrigerator compartment and another in the freezer if your model has one. Record the temperatures and give the refrigerator the operating time specified in its manual before deciding that it has failed.

A refrigerator that was recently started, filled with warm food, or opened repeatedly may need more time to stabilize. Avoid overpacking it; cold air needs room to circulate around the contents.

Check the simple causes first

  • Confirm the refrigerator is switched on and set to the intended operating mode.
  • Look for an error code, warning light, or audible alarm and consult the model-specific manual.
  • Make sure the door closes fully and the gasket seals evenly around the opening.
  • Check for heavy frost that may restrict airflow around the evaporator fins.
  • Remove anything blocking the interior air passages or exterior ventilation grilles.
  • For an absorption refrigerator in a parked trailer, make sure the RV is reasonably level.

Exterior vents must remain unobstructed so heat can escape from the cooling unit. Leaves, storage items, insect nests, or aftermarket covers installed at the wrong time can reduce performance. Inspect only from a safe position and do not reach into a hot or energized appliance compartment.

Compare the available operating modes

If the refrigerator is designed to run on more than one energy source, note whether the problem occurs on every mode or only one. A refrigerator that cools on shore power but not on LP gas points to a different problem than one that does not operate in any mode.

Owner-safe electrical checks are limited to confirming that the RV has power, checking the labeled breaker or fuse identified in the manual, and ensuring the refrigerator controls are receiving the expected supply. Testing voltage behind the refrigerator or opening an electrical enclosure should be left to a qualified technician.

For LP operation, confirm the cylinder is not empty and that the system is being used according to the appliance manual. Do not attempt to adjust, clean, or relight a burner if you smell gas, see soot, or are unsure of the procedure.

Know when to shut the refrigerator down

Stop troubleshooting and arrange professional service if you notice any of the following:

  • An ammonia odor or yellow residue near an absorption refrigerator.
  • The smell of LP gas, soot, scorching, or unusual heat.
  • Damaged wiring, melted connectors, or repeatedly tripped electrical protection.
  • A fault code that the owner’s manual directs to an authorized service provider.
  • Cooling that does not improve after the basic checks and the required operating time.

If an absorption refrigerator emits an ammonia odor, turn it off if it is safe to do so, ventilate and leave the RV, shut off the LP supply without disconnecting any fittings, and contact a qualified service provider. Do not continue operating the refrigerator.

Do not use the “upside-down refrigerator” trick

Older advice sometimes recommends removing an absorption refrigerator and turning it upside down to clear an internal blockage. That is not an owner-safe repair. The cooling unit is sealed and pressurized, the appliance may contain hazardous chemicals, and removing it involves electrical, gas, ventilation, and structural connections. A refrigerator with a suspected cooling-unit problem should be inspected by a qualified RV technician.

What to record before requesting service

Good information can shorten diagnostic time. Before calling, collect the refrigerator’s model and serial number, any fault code, the operating mode that failed, temperature readings, outside temperature, battery voltage if displayed by the RV, and whether the trailer was level. Mention any recent battery, propane, electrical, or appliance work.

A methodical check can resolve simple problems and give a technician a much clearer starting point when service is needed. When the issue involves LP gas, exposed wiring, the sealed cooling system, or a persistent safety warning, stop and let a qualified RV professional diagnose it.
What Makes a Peak Camp Four‑Season Ready?

Cold-weather capability is not created by one upgrade. It comes from the way insulation, heating, plumbing, power, structure, and day-to-day operation work together. A camp that performs well in winter must slow heat loss, keep vulnerable systems protected, and give the owner practical ways to monitor and manage changing conditions.

Know your specific camp: “Four-season” and “all-season” are not universal performance ratings. Capabilities vary by model, floor plan, installed equipment, weather, wind, altitude, available power, and how the camp is operated. Confirm the current specifications and cold-weather procedures for your exact build with Peak and follow every component manufacturer’s instructions.

A complete thermal envelope

Insulation works best as a continuous system. Walls, roof, floor, doors, windows, penetrations, and utility openings all influence how quickly heat escapes. Gaps and poorly sealed openings can undermine otherwise capable materials.

Thermal-pane windows, well-fitted doors, effective weather seals, and carefully detailed wall and roof assemblies help reduce heat transfer and drafts. Actual materials and construction details depend on the individual Peak model and build specification.

Protected plumbing and holding systems

Water systems are among the most vulnerable parts of any RV in freezing weather. Tanks, supply lines, low-point drains, valves, traps, exterior showers, and termination plumbing may be exposed to different temperatures—even when the living area feels comfortable.

Depending on the build, cold-weather protection may include enclosed or insulated plumbing areas, heat routed around vulnerable components, and an accessible winterization and water-heater bypass arrangement. These features still depend on heat and power being available. If the camp will be unattended, exposed to temperatures beyond its capabilities, or stored in freezing conditions, it should be winterized according to its manuals.

Heat designed for the space

A properly sized heating system must do more than warm the air near the thermostat. Heat distribution, interior airflow, cabinet spaces, plumbing locations, and the frequency with which doors are opened all affect comfort and freeze protection.

Some Peak builds may be configured with more than one approved heat source, such as a forced-air furnace and a professionally installed wood-burning stove. Every appliance must be operated exactly as directed, with required clearances and ventilation. Smoke, carbon monoxide, and propane alarms must remain installed, powered, unobstructed, and tested.

Moisture control and ventilation

Winter camping creates moisture from breathing, cooking, wet clothing, and combustion. When warm humid air reaches a cold surface, condensation can collect on windows, walls, cabinets, or hidden materials.

Use roof vents or other approved ventilation, run exhaust fans when cooking or showering, dry wet gear, and monitor humidity. A small amount of planned ventilation may improve comfort and protect the interior even though the heating system must replace some lost heat.

Power capacity for cold nights

Cold weather can increase energy demand while reducing available battery performance. Furnace blowers, lights, water pumps, controls, fans, tank or line heaters, and other equipment may all draw from the electrical system.

A winter-ready power plan accounts for expected overnight loads, battery capacity in cold conditions, charging time, propane supply, solar production, generator limitations, and a safe backup plan. Solar can help replenish a battery bank, but short days, snow cover, shade, and storms can reduce production.

Structure and running gear for the route

Winter capability also includes the route to camp. The frame, axle capacity, suspension, tires, brakes, ground clearance, and loaded weight must match the intended terrain and towing conditions. A strong camp does not eliminate the hazards of ice, snow, wind, steep grades, or poor visibility.

Check forecasts and road restrictions, inspect tires and brakes, carry appropriate recovery and emergency equipment, and postpone travel when conditions exceed the tow vehicle, trailer, or driver’s capability.

The owner remains part of the system

No trailer can manage winter automatically. Before and during a cold-weather trip:

  • Review the camp and appliance manuals.
  • Know which plumbing components require heat or winterization.
  • Monitor interior temperature, vulnerable compartments, battery state of charge, and fuel supply.
  • Keep vents, exhaust outlets, and combustion-air openings clear of snow and debris.
  • Test smoke, carbon monoxide, and propane alarms.
  • Plan for weather changes, road closures, loss of power, and an emergency departure.

Questions to ask when planning a four-season build

Cold-weather priorities should be discussed early in the design process. Ask about:

  • Wall, roof, floor, window, and door construction.
  • The location and protection of tanks, water lines, valves, and drains.
  • Heating capacity and how heat reaches plumbing areas.
  • Battery capacity, charging options, and expected winter electrical loads.
  • Ventilation and condensation-management features.
  • Winterization access and the procedure for every installed component.
  • Any model-specific temperature guidance, testing, or operating limitations.

Built around where you travel

A four-season Peak Mountain Camp is best understood as a coordinated build rather than a label. Thoughtful construction and the right equipment can extend the camping season, but the best configuration depends on where the camp will travel, how it will be used, and which systems the owner needs to keep operating.

Talk with Peak about your expected temperatures, terrain, trip length, available hookups, towing setup, and comfort priorities. Those details give the design team a practical foundation for recommending the right features for your route.

Built to Last: The Materials and Craftsmanship Behind Peak Mountain Camps

A camp built for years of backroads, changing weather, and everyday use has to be more than attractive. Its structure, materials, layout, and finishing details must work together. At Peak Outdoors, that process begins with how the owner plans to use the camp and continues through construction and final inspection.

Built for the owner: Peak Mountain Camps are custom products. Dimensions, materials, appliances, systems, and available options vary by model and build. Confirm the current specifications for the camp you are considering with the Peak team.

Purposeful design comes first

A camp for agricultural work may face different roads, loads, and daily routines than one designed for family recreation, hunting, or extended off-grid travel. That is why the design process should start with intended use rather than a generic list of features.

Travel terrain, towing requirements, sleeping capacity, storage, plumbing, power, heating, and cooking preferences all affect the finished design. Looking at these needs together helps create a camp that feels coherent instead of a collection of unrelated upgrades.

Strength begins below the surface

Much of a camp’s durability is determined by the parts that are not immediately visible. Peak describes its approach as using application-specific materials in key structural areas and building with strength, simplicity, and long service life in mind.

The frame, body structure, roof, exterior, cabinetry, and installed systems must support one another. Material choices and connection points matter because vibration, uneven roads, temperature changes, and repeated use place different demands on a trailer than on a stationary building.

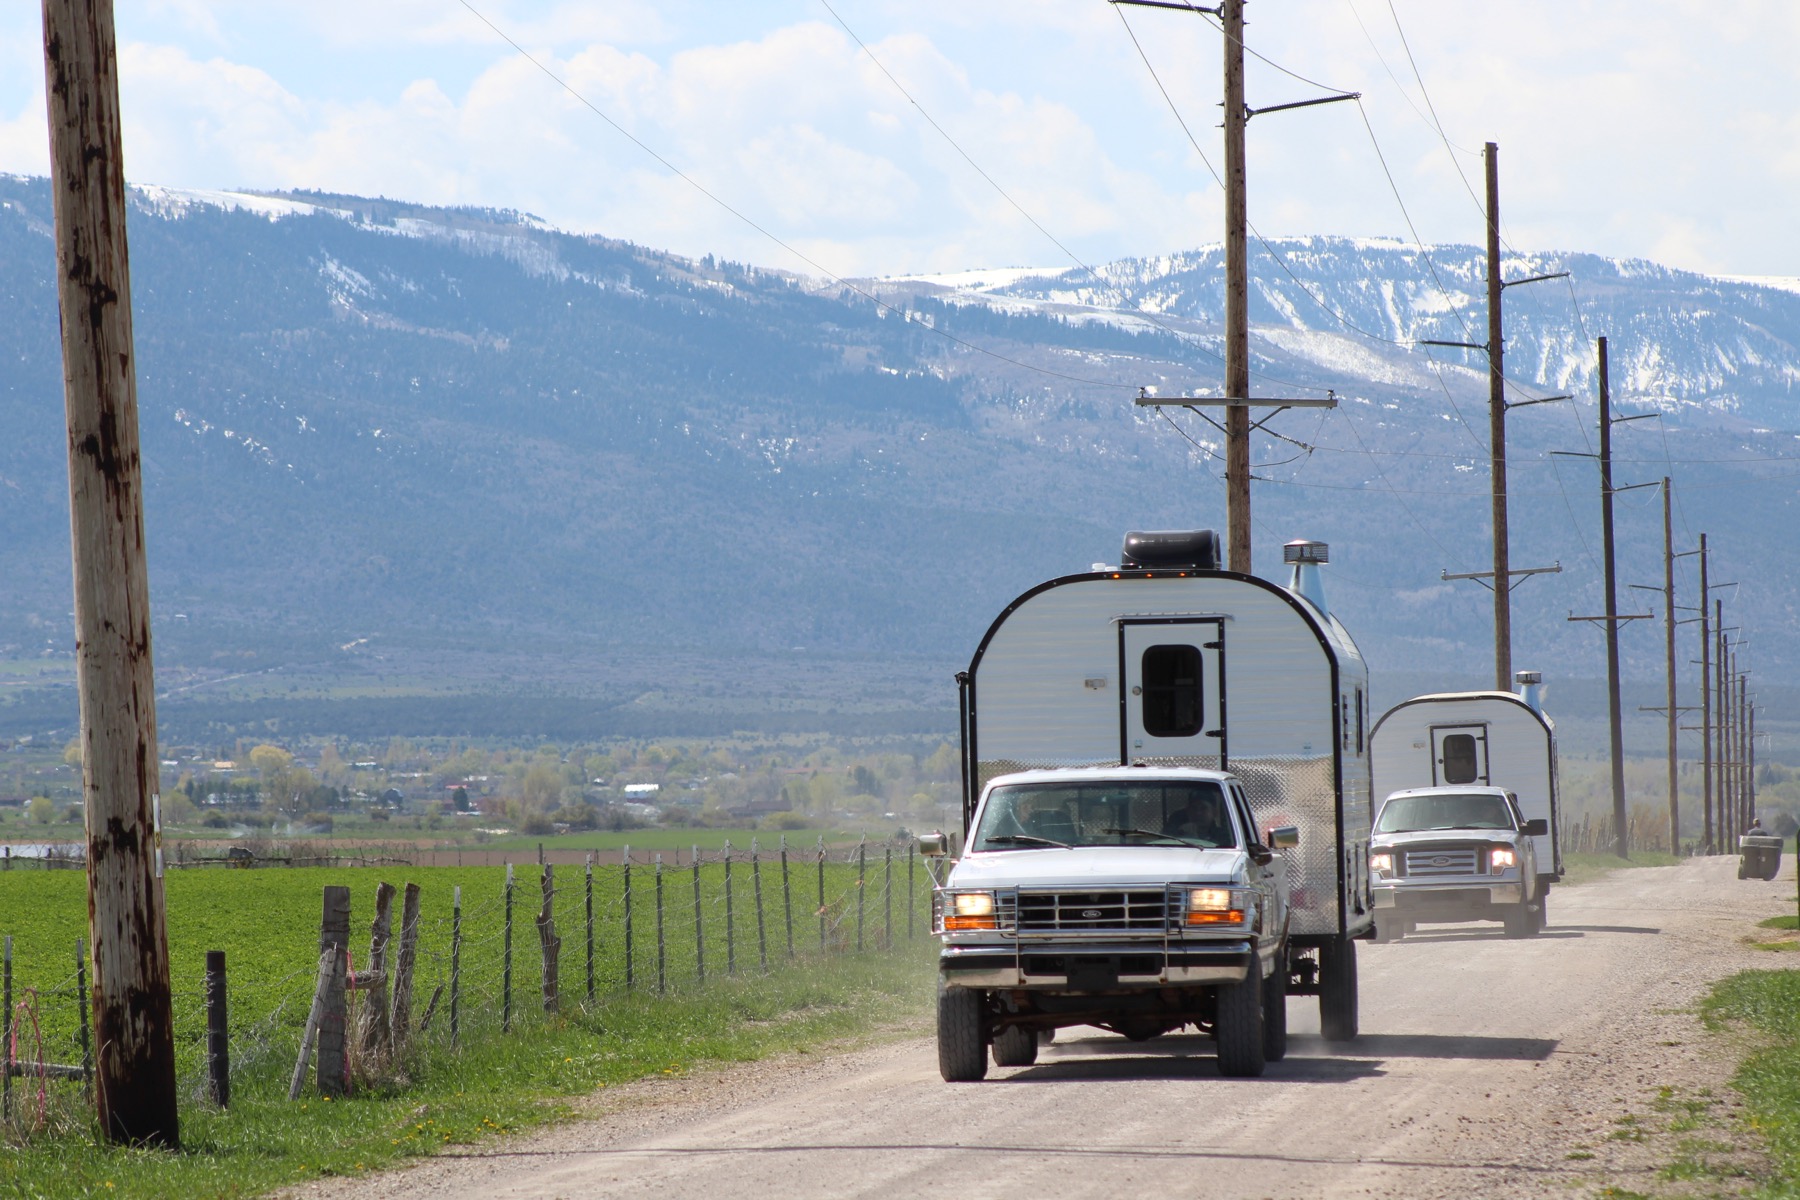
Two Peak Mountain Camps traveling a rural road below snow-covered mountains
Peak camps are designed around the routes and conditions their owners expect to encounter.

Craftsmanship you can see and use

Durability also shows up in the parts owners touch every day. The original Peak Advantage article highlights hardwood cabinetry, dovetail drawers, and carefully finished upholstery as examples of details chosen for function as well as appearance.

Cabinet doors, drawers, latches, work surfaces, seating, and trim are used repeatedly in a compact space. Careful fit and finish make the interior more comfortable, while sound joinery and well-supported components help those features continue to work as intended.

Comfort and performance belong together

A rugged camp does not need to feel utilitarian. Thoughtful storage, practical work areas, comfortable seating, and well-placed appliances can make daily routines easier without compromising the camp’s intended use.

Peak’s custom-build approach allows owners to prioritize the features that matter for their trips. That may include a wood-burning stove, expanded power capability, a particular kitchen arrangement, additional storage, or systems selected for four-season travel. Availability and configuration depend on the individual build.

Inspection is part of the build

Materials and craftsmanship only deliver value when the finished systems operate correctly. Peak’s process includes quality-control checks during construction, followed by a final inspection. The customer then has an opportunity to learn the camp and confirm that its features meet the agreed specifications.

This attention to the complete camp matters because structure, plumbing, electrical equipment, appliances, cabinetry, and exterior sealing all interact. A good handoff should leave the owner confident in how the systems work and what routine care they require.

Choosing features for your camp

Before specifying a custom camp, make a realistic list of how and where it will be used:

  • The terrain and road conditions it will travel.
  • The tow vehicle and expected loaded weight.
  • The number of people it must sleep and support.
  • The amount of time it will spend away from hookups.
  • The seasons and temperatures it must handle.
  • The cooking, heating, water, power, and storage features you use most.

Those priorities give the design team a clearer foundation for recommending a layout and feature package.

Build a camp around your route

The Peak Advantage is not a single appliance or decorative upgrade. It is the way design decisions, structural materials, hands-on craftsmanship, useful features, and inspection come together in a camp built for its owner.

If you are planning a custom build, explore the current Peak camp lineup and talk with the team about your terrain, towing needs, preferred features, and travel style.

Gratitude in Every Season: The People and Places Behind Peak Outdoors

Gratitude is easy to talk about when the leaves turn gold and the year begins to slow down. At Peak Outdoors, however, it is not limited to one holiday or season. It shows up in the trust a customer places in our team, the care that goes into a camp, and the stories owners share after taking it into the places they love.

Every custom build begins with a conversation about how someone plans to use it. Those conversations remind us that a camp is rarely just a trailer. It may become a hunting base, a warm place for a working family, a gathering spot for children and grandparents, or a dependable home far beyond cell service and paved roads.

GRATEFUL FOR THE PEOPLE WHO TRUST US

A custom camp represents a significant decision. Owners share their priorities, routines, and plans with us so the layout and features can support the way they actually travel or work. We do not take that trust lightly.

We are grateful for the customers who ask thoughtful questions, visit the shop, compare options, and stay involved throughout the process. Their feedback helps us understand what performs well in the field and where a design can be improved. Many of the most practical ideas begin with someone explaining what would make a long day outdoors safer, simpler, or more comfortable.

GRATEFUL FOR WORK DONE WITH CARE

Building a camp requires many hands and many decisions. Framing, plumbing, electrical work, cabinetry, finishes, appliances, and final inspections all have to work together. The quality of the finished camp depends on people paying attention even when a detail will eventually be hidden behind a wall or inside a cabinet.

We appreciate the craftspeople, suppliers, service partners, and team members who bring knowledge and accountability to that process. Pride in the work is not a slogan. It is the choice to measure again, route something cleanly, solve a problem correctly, and complete the final checks before a camp leaves the shop.

GRATEFUL FOR TRADITIONS THAT CONTINUE

Some Peak camps support demanding work in open country. Others carry families toward a favorite hunting area, trailhead, reservoir, or quiet weekend campsite. Their uses are different, but they often share the same purpose: helping people spend meaningful time together and stay connected to traditions worth continuing.

The best stories are not always about a distant destination. They may be about breakfast beside a wood stove, children learning how to set up camp, an evening meal after a long day, or returning to the same place year after year. A well-built camp creates room for those moments without becoming the center of them.

GRATEFUL FOR THE PLACES THAT WELCOME US

Utah and the surrounding West offer remarkable access to mountains, desert, open range, forests, and small communities. That access carries responsibility. We are grateful for the landowners, public-land staff, campground hosts, volunteers, and local communities who help care for these places.

Gratitude should affect how we travel. It means respecting closures and private property, packing out waste, preventing avoidable damage, maintaining safe campfires, and leaving a campsite ready for the next person. Enjoying the outdoors and caring for it belong in the same conversation.

GRATITUDE THROUGH EVERY SEASON

Each season asks something different of a camp and its owner. Spring brings inspections and preparation. Summer brings long travel days and crowded destinations. Fall brings changing weather and the return of familiar traditions. Winter demands planning, reliable systems, and respect for the conditions.

Through all of them, we remain thankful for the opportunity to build, maintain, and improve equipment that helps people live and work outdoors. We are especially grateful when owners return with a photo, a lesson from the trail, or a story about where their camp has taken them.

THANK YOU FOR BEING PART OF PEAK OUTDOORS

To our customers, employees, suppliers, neighbors, and everyone who has recommended Peak Outdoors to another person: thank you. Your confidence gives our work purpose, and your experiences continue to shape what we build.

Wherever the next season takes you, we hope it includes time with people who matter, respect for the places you visit, and a camp that helps you return safely and comfortably.

RV Winterization Checklist: Protect Your Plumbing Before a Freeze

Freezing weather can turn a small amount of trapped water into a split fitting, cracked valve, damaged pump, or costly water-heater repair. Winterizing an RV is the process of removing water from vulnerable components and protecting the plumbing system before temperatures reach freezing.

Start with your owner’s manual: RV plumbing layouts and appliances vary. Tankless water heaters, hydronic heating systems, ice makers, washing machines, water filters, and other equipment may require procedures that differ from a conventional travel trailer. Follow the instructions for your exact RV and every installed component. If the correct valve positions or procedures are unclear, schedule professional winterization.

When should you winterize an RV?

Winterize before the RV is exposed to temperatures at or below 32°F (0°C), unless the manufacturer provides different guidance for your model. Do not wait for an extended hard freeze. Exterior lines, low-point drains, valves, and other components can be vulnerable before the interior of the RV feels especially cold.

Winterization is also appropriate before seasonal storage in a cold climate. If you plan to use the RV through winter, consult the manufacturer about heated compartments, tank heaters, insulation, power requirements, and cold-weather operating limits. Four-season construction can improve cold-weather capability, but it does not eliminate the need to protect plumbing when heat or power may be interrupted.

Supplies to gather

  • The owner’s manuals for the RV, water heater, water pump, and optional water-using appliances
  • Non-toxic RV/marine antifreeze intended for potable-water systems
  • A water-pump winterization or siphon hose, if the RV is equipped to use one
  • A water-heater bypass, if required by the RV’s plumbing design
  • Basic hand tools and the correct tool for the water-heater drain plug or anode rod
  • A bucket, towels, and containers for filters or small parts
  • A regulated air compressor and RV blowout adapter only if the approved procedure uses compressed air
  • Replacement drain-plug seals, filter bypass plugs, or anode components when required

Never use automotive antifreeze in an RV potable-water system. Use only the product type and quantity specified by the RV and component manufacturers.

1. Shut down and prepare the water system

Disconnect the city-water supply and turn off the water pump. Turn off the water heater in every operating mode—electric, propane, or both—and allow the water to cool completely. Relieve system pressure according to the manufacturer’s instructions before opening drains or removing a water-heater plug.

Empty the black and gray holding tanks at an approved dump station. Flush them if the RV’s procedure calls for it, then close the valves when finished. Remove food, liquids, toiletries, and cleaning products that could freeze or attract pests during storage.

2. Drain the fresh-water system

Open the fresh-water tank drain and the hot- and cold-water low-point drains. Open each faucet to admit air and help the system drain, including the kitchen, bathroom, shower, exterior shower, toilet, and any additional sprayers or fixtures. Keep track of drain caps and seals so they can be reinstalled in the correct locations.

Remove or bypass water-filter cartridges as directed. A filter housing can retain enough water to freeze and crack, and many filters should not be exposed to antifreeze.

3. Drain and bypass the water heater

Confirm again that the water heater is off, cool, depressurized, and disconnected from power. Drain it using the procedure for that specific unit. Conventional tank-style heaters may use a drain plug or anode rod; tankless and hydronic systems can require entirely different steps.

Set the water-heater bypass valves only as directed for the winterization method you are using. The bypass keeps RV antifreeze out of a conventional water-heater tank, saving antifreeze and avoiding unnecessary exposure. Do not assume that every three-valve or single-valve system uses the same handle positions.

4. Protect the water lines

Manufacturers commonly specify one of two approaches: clearing lines with regulated compressed air or pumping non-toxic RV antifreeze through the plumbing. Some procedures use both. Follow the method and maximum air pressure stated in your owner’s manual; excessive pressure can damage fittings, valves, and appliances.

If the approved procedure uses compressed air

Connect a regulated compressor through an RV blowout adapter at the designated inlet. Open one fixture at a time so air is directed through that branch, working through hot and cold sides as instructed. Include the toilet, shower, exterior fixtures, and any manufacturer-listed accessories. Disconnect the compressor when the lines are cleared.

If the approved procedure uses RV antifreeze

Use the built-in winterization connection or a pump siphon hose to draw antifreeze directly from its container whenever the RV is designed for that method. Avoid pouring antifreeze into the fresh-water tank unless the manufacturer specifically instructs you to do so.

With the water heater correctly bypassed and drains configured as directed, run the pump and open one fixture at a time until the specified antifreeze appears. Treat hot and cold sides separately. Include the toilet and exterior fixtures, then turn off the pump and relieve pressure as instructed.

5. Protect drains and special equipment

Add the manufacturer-recommended amount of RV antifreeze to sink and shower traps and, where instructed, to the toilet and holding tanks. Winterize every connected component that can retain water, including an ice maker, washing machine, dishwasher, refrigerator water line, black-tank flush, outdoor kitchen, macerator, or hydronic system. Each may have a separate manual and sequence.

Do not improvise with unfamiliar appliances. An incorrect compressed-air or antifreeze procedure can damage check valves, pumps, heating elements, or seals.

6. Prepare the rest of the RV for storage

  • Inspect roof seams, windows, doors, vents, and exterior seals for damage or gaps.
  • Clean and dry the refrigerator, then store it with the doors secured slightly open if the manufacturer recommends it.
  • Remove food and pest-attracting materials; clean counters, cabinets, and floors.
  • Check tire pressure and storage recommendations, including support and movement guidance.
  • Follow the battery manufacturer’s instructions for charging, disconnecting, removing, or maintaining batteries.
  • Close propane cylinders and service valves only as directed, and never use an open flame to check for leaks.
  • Leave smoke, propane, and carbon-monoxide alarms installed. Follow their manufacturers’ storage and battery instructions.
  • Use only an RV cover designed for the unit, with proper ventilation and securement, or store the RV indoors when available.

Final winterization check

  • Fresh-water tank, holding tanks, low points, and water heater drained as required
  • Water heater and filters bypassed or configured correctly
  • Every hot and cold fixture protected
  • Toilet, exterior shower, and optional water-using appliances completed
  • Drain traps and holding tanks protected according to the manual
  • Power, batteries, propane, tires, seals, food, and pest prevention addressed
  • All removed plugs, caps, filters, and components labeled and stored for spring

When to call a professional

Professional winterization is the safer choice when the valve layout is unclear, the RV has a tankless or hydronic system, appliances have separate winterization procedures, prior freeze damage is suspected, or you cannot verify that every water path has been protected. A service appointment can cost far less than repairing a split line or damaged appliance after a freeze.

Peak Outdoors can winterize the system, inspect common problem areas, and document what will need to be reversed when the RV returns to service. Schedule early—before the first hard freeze is in the forecast.

Manufacturer resources

Wood‑Burning Stoves in Camp Trailers: Warmth, Tradition, and Craftsmanship

On a cold morning in the mountains, warmth inside a camp is more than a convenience. It creates a place to dry out, share a meal, plan the day, and reconnect after hours outside. That sense of warmth has deep roots in the sheep camps and sheepherders’ wagons that helped shape Peak Outdoors.

Wood-burning stoves have long served people working and living far from conventional utilities. Their steady radiant heat became part of daily life on the range—and part of the character of the camps themselves. Today, that tradition can still have a place in a carefully designed custom camp trailer.

Warmth with a history

Peak’s connection to wood heat is tied to the same central Utah communities where craftsmanship, resourcefulness, and neighborly support remain part of everyday life. During winter gatherings in Spring City, people come together around lights, food, conversation, and the glow of a shared fire. The warmth matters, but so does what it represents: reliability, welcome, and a reason to gather.

A wood stove brings that same feeling into a camp. Its heat is direct and tangible, and the ritual of tending a small fire can make a remote trailer feel grounded and familiar. For owners who spend time in cold, isolated country, that connection can be as meaningful as the temperature inside.

More than a source of heat

A compact wood stove can provide steady radiant warmth without depending on shore power. That makes it appealing for certain off-grid trips, working camps, and cold-weather stays. It can also become a natural focal point in the interior: a place to warm up, slow down, and settle in for the evening.

That does not mean a wood stove is the right choice for every owner or every destination. It requires planning, appropriate fuel, routine attention, and responsible operation. The best heating system is the one that matches how and where the camp will actually be used.

Designed into the camp from the beginning

In a compact trailer, a solid-fuel appliance cannot be treated as an afterthought. The stove, hearth, heat shielding, clearances, stovepipe, roof penetration, ventilation, storage, and surrounding floor plan need to work together as one system.

That is why the conversation should begin during the design process. Peak can consider the owner’s intended climate, trip length, available space, preferred layout, and heating expectations before the camp is built. Integrating the feature from the beginning protects usable space and allows the surrounding materials and components to be planned around the installation requirements.

Craftsmanship you can see

A well-built camp reveals its quality in the details: solid cabinetry, durable surfaces, serviceable systems, secure hardware, and components selected for real travel. A wood-stove installation should reflect that same standard. It should look intentional because it was intentional—not simply added after the rest of the trailer was finished.

That approach carries forward the values behind the traditional range camp. Build for the conditions. Use materials responsibly. Make every component earn its place. Create something dependable enough to serve today and durable enough to be part of the next generation’s stories.

Safety comes first: A wood stove should never be used as a portable add-on inside a camp trailer. Use only an appliance and venting system appropriate for the application, installed by qualified professionals in accordance with the stove, chimney, and trailer manufacturers’ requirements. Maintain required clearances and heat protection, keep the venting system inspected and clean, and use working smoke and carbon-monoxide alarms. Never disable an alarm. Follow all campground rules, local fire restrictions, and burn bans. If an alarm sounds or anyone experiences possible carbon-monoxide symptoms, leave the trailer immediately and call emergency services.

A camp that feels like home

Peak Outdoors builds custom camps around the people who will use them. For some owners, that means a modern electrical system and familiar RV conveniences. For others, it also means the enduring warmth of a small wood fire and a direct connection to generations of life on the range.

The goal is not to recreate the past. It is to carry its best qualities forward: practical design, honest materials, careful craftsmanship, and a space where people feel welcome. A thoughtfully designed wood-stove camp can provide all four.

Interested in including a wood-burning stove in a custom camp? Talk with Peak early in the design process so the heating system, layout, and intended use can be considered together.

Additional safety resources

RV Carbon Monoxide Alarm Safety: Why You Should Never Disable It

Important correction: This article concerns carbon monoxide (CO), not carbon dioxide (CO2). The RV life-safety device discussed below is a carbon monoxide alarm.

A carbon monoxide alarm is easy to overlook until it chirps or sounds unexpectedly. In an RV, however, disconnecting or covering that alarm can remove a critical warning against a gas you cannot see, smell, or taste. A working RV-rated CO alarm should remain powered, unobstructed, and ready to warn everyone inside.

Carbon monoxide is produced when fuel burns. In the compact interior of an RV, CO from an appliance, engine, generator, or nearby exhaust source can accumulate without an obvious warning. An alarm provides an essential layer of protection, but it does not replace correct appliance operation, ventilation, exhaust-system maintenance, or safe generator placement.

Why a working CO alarm is essential

Carbon monoxide interferes with the body’s ability to carry oxygen. Exposure can cause sudden illness, loss of consciousness, or death. People who are asleep may not notice symptoms before they are unable to respond.

The U.S. Consumer Product Safety Commission recommends CO alarms for recreational vehicles. The alarm is intended to warn occupants before the gas reaches a potentially life-threatening level, giving everyone time to leave and call for help.

Some RVs use a combination carbon monoxide and propane alarm. That unit monitors two separate hazards: carbon monoxide produced by combustion and unburned propane from a fuel leak. Both functions are important, and neither should be disabled.

Where carbon monoxide can come from

Any fuel-burning system can become a CO source when it is damaged, improperly used, poorly vented, or affected by an exhaust obstruction. Potential sources around a camper include:

  • A furnace, water heater, refrigerator burner, range, or oven
  • A portable generator or built-in generator
  • The tow vehicle, motorhome engine, or another vehicle idling nearby
  • A neighboring campsite’s generator or engine exhaust
  • Portable heaters, grills, lanterns, or camp stoves used in an enclosed area
  • Blocked, damaged, or poorly positioned exhaust outlets

Opening a window is not a dependable substitute for safe equipment use. Wind can direct outside exhaust toward a window, door, vent, slide-out, or other opening. Never use charcoal or fuel-burning camping equipment inside an RV unless the equipment is specifically designed, listed, installed, and operated for that enclosed application.

Why disconnecting the alarm is dangerous

An alarm that chirps, shows a fault, or activates unexpectedly needs attention. Disconnecting it removes the warning without resolving the reason it sounded. Do not cover the sensor, paint it, relocate it, or leave it without power.

A chirp may indicate low voltage, a fault, or the end of the alarm’s service life. An emergency alarm pattern can indicate detected carbon monoxide or propane. Indicator lights and sound patterns vary by model, so read the label and owner’s manual before a trip. Everyone who uses the RV should know the difference between an alarm, a trouble signal, and an end-of-life signal.

If nuisance signals continue, the answer is inspection and diagnosis—not permanent disconnection. The alarm, its power supply, nearby appliances, and exhaust systems may all need to be checked.

What to do if the CO alarm sounds

Treat an active CO alarm as an emergency. Do not stay inside to search for the source.

  1. Move everyone outside to fresh air immediately. Account for every person and pet.
  2. Call 911 or the local fire department from outside. Follow the directions of emergency responders.
  3. Do not re-enter the RV until emergency personnel say it is safe.
  4. Do not operate a suspected appliance or system again until it has been inspected and repaired by a qualified technician.

The CPSC advises occupants to move outside and call emergency services rather than attempting to locate the source themselves. Silencing or resetting an alarm does not prove the RV is safe.

Know the symptoms of CO poisoning

According to the Centers for Disease Control and Prevention, common symptoms include headache, dizziness, weakness, upset stomach, vomiting, chest pain, and confusion. Symptoms may resemble the flu, but CO poisoning does not produce a fever. A person who is asleep or impaired may lose consciousness before recognizing any warning signs.

If anyone may have been exposed, get to fresh air and call emergency services. Do not drive yourself for treatment if you are symptomatic. Symptoms are a reason to leave immediately even if the alarm has not activated.

Test and maintain the alarm

Use the testing schedule printed on the alarm and in its manual. The CPSC recommends testing CO alarms monthly, while some RV-specific combination alarms instruct owners to test more often. Follow the instructions for the unit installed in your RV.

  • Press the test button according to the manufacturer’s procedure.
  • Confirm the alarm has uninterrupted 12-volt power or a serviceable battery, depending on its design.
  • Keep the face and sensor openings free of dust, paint, furniture, curtains, and stored gear.
  • Learn the indicator lights and audible patterns before an emergency.
  • Replace the unit when its end-of-life signal activates or at the interval specified on its label.
  • Use a replacement listed and marked for recreational-vehicle use, installed according to its instructions.

The test button checks the alarm’s circuitry and audible warning; it is not a complete measurement of sensor accuracy. Never test an alarm with vehicle exhaust, a flame, or another improvised CO source.

Reduce the risk before every trip

Inspect fuel-burning appliances and exhaust systems as part of routine RV maintenance. Keep exterior vents and exhaust outlets clear of snow, nests, covers, mud, and stored equipment. Operate generators only outdoors in accordance with the generator manufacturer’s instructions, well away from doors, windows, vents, and neighboring camps. The National Fire Protection Association’s RV safety guidance also emphasizes maintaining a working CO alarm and watching for exhaust hazards.

Before sleeping in the RV, verify that the CO alarm shows normal operation. If it will not power on, will not pass its prescribed test, or displays a fault or end-of-life condition, replace or service it before occupying the RV.

Keep the warning in place

A working carbon monoxide alarm is a small device with a life-saving purpose. Keep it connected, test it as directed, replace it at the end of its rated life, and treat every emergency alarm as real.

If your RV’s alarm is chirping, showing a fault, or activating repeatedly, Peak Outdoors can inspect the alarm, its power supply, and potential appliance or exhaust-system sources. A life-safety warning should be diagnosed before the RV is used again.

Nine Utah Campgrounds to Explore This Fall

Fall can be one of the best times to camp in Utah. Cooler afternoons make hiking and camp setup more comfortable, autumn color transforms high-country forests, and desert destinations become inviting again after summer heat. The tradeoff is that daylight fades earlier and high-elevation services can shut down quickly, so a good fall trip starts with current information and a backup plan.

These nine campgrounds cover mountain forests, reservoir shores, red-rock country, and quiet desert terrain. Some are best for an early-fall weekend; others remain practical much later in the season.

Check before you tow: Confirm the campground’s opening dates, road conditions, water availability, fire restrictions, reservation rules, and maximum site length immediately before departure. Overnight temperatures at Utah’s higher elevations can fall below freezing even when the valley forecast looks mild.

1. Duck Creek Campground

Duck Creek is a strong early-fall alternative in Dixie National Forest. The campground sits among aspen, Douglas fir, and old-growth ponderosa pine near Duck Creek Pond, with access to fishing, hiking, scenic drives, and the Markagunt trail system. Cedar Breaks, Navajo Lake, Cascade Falls, and several volcanic features are also within day-trip range.

At roughly 8,400 feet, this is a place to bring warm layers and expect seasonal services. Drinking water is not available throughout the entire fall, and current fire restrictions may limit cooking to approved gas equipment. Review the latest details on the official Duck Creek campground page before leaving.

2. Rendezvous Beach at Bear Lake

Rendezvous Beach combines a developed campground with broad views across Bear Lake. Four camping areas provide a mix of tent, group, and RV options, making it useful for families or groups that want a defined site near the water. In early fall, the lake can still anchor a weekend of paddling, shoreline walks, fishing, and scenic driving without the peak-summer pace.

The camping season typically runs into late October, but individual facilities and gates follow seasonal schedules. Check the Bear Lake State Park facilities page for current dates and site details.

3. McMillan Spring Campground

McMillan Spring is a small BLM campground in the Henry Mountains, surrounded by ponderosa pine and expansive views. Its nine sites offer a quieter, more self-reliant experience than Utah’s larger reservoir campgrounds. The campground also includes equestrian facilities, making it especially useful for travelers bringing horses.

Potable water and other services are seasonal, and the remote setting calls for careful fuel, weather, and route planning. Read the current facility information on the BLM’s McMillan Spring page and arrive prepared to operate without dependable cell service.

4. Jordanelle State Park

Jordanelle is a practical choice when you want mountain scenery without giving up developed campground amenities. Hailstone offers RV sites with partial hookups, while McHenry is reserved for tent camping. The park also has hike-in and group options, placing campers near the reservoir, Heber Valley, Park City, and a network of nearby trails.

Reservable camping generally continues through October, although weather and park conditions can change. Because the park is close to major Wasatch Front destinations, reservations are wise. Compare campground types on the Jordanelle facilities page and check the park’s current alerts before arrival.

5. Currant Creek Campground

Currant Creek Campground sits above its reservoir among aspen, fir, and lodgepole pine. The combination of water, wildlife, mountain views, and changing leaves makes it a natural early-fall destination. Campers can fish, boat, hike, bike, or simply use the campground as a quiet base in the Uinta-Wasatch-Cache National Forest.

This is another high-elevation campground where water service and temperatures require extra attention. Current alerts note limited water availability in parts of the campground, so bring enough for your stay unless the official notice says service has been restored. Review alerts and facilities on the Currant Creek campground page.

6. Palisade State Park

Palisade State Park offers an easygoing fall base in Sanpete County. Campsites range from no-hookup spaces to full-hookup options, and every site includes room for a tent or camp trailer. The compact reservoir supports paddling and fishing, while nearby hiking, golf, and access toward Six-Mile Canyon add variety to a longer stay.

The park’s lower elevation makes it a useful option when colder weather is closing in on Utah’s alpine campgrounds. See the official Palisade camping page for current reservations, campground choices, and facility information.

7. Mustang Ridge Campground

Mustang Ridge occupies a pinyon-and-juniper bluff above Flaming Gorge Reservoir. Sites on the outer loop look across the water, while a nearby boat ramp gives campers convenient access to fishing, paddling, and boating. Paved roads, drinking water, toilets, showers, and a mix of family and group sites make it a developed base for exploring the reservoir and Green River corridor.

The campground is exposed enough that wind and changing weather deserve attention, and seasonal closing dates should be confirmed before a late trip. The Mustang Ridge campground page has current notices and site information.

8. Fruita Campground at Capitol Reef

Fruita Campground is one of Utah’s standout fall settings. Cottonwoods shade the campground beside the Fremont River, and the historic orchards bring an unexpected patch of green and gold to Capitol Reef’s red-rock landscape. The campground has 71 sites for tents and RVs, along with potable water, restrooms, and a dump station, but no individual hookups or showers.

Fruita is open year-round and uses a reservation system, with strong demand through October. Reserve early, confirm your site’s vehicle dimensions, and use the National Park Service campground page for current details.

9. Snow Canyon State Park

When temperatures begin dropping in northern Utah, Snow Canyon becomes especially appealing. Its 38-site campground is tucked among lava flows and orange sandstone, with tent, hike-in, group, and partial-hookup options. Trails leave campers close to dunes, canyon walls, overlooks, and the park’s desert wildlife.

The campground is open year-round, and fall is one of the park’s busiest seasons, so reservations are strongly recommended. Check availability and current park alerts through the official Snow Canyon campground page.

Plan for the season, not just the destination

A comfortable fall trip depends on more than finding an open campsite. Pack for freezing nights at elevation, bring a reliable light for early sunsets, and confirm that your battery, propane, water, and waste capacity match the services available. If towing, verify both the campsite length and the approach road rather than relying only on a campground’s general RV designation.

  • Check the managing agency’s alerts on the day you leave.
  • Carry enough drinking water when seasonal systems may be off or limited.
  • Know the current fire rules and bring an approved alternative to a campfire.
  • Download maps and reservation details before losing service.
  • Keep a lower-elevation backup when snow or freezing weather is possible.

Utah’s fall camping season is short in the mountains and generous in the desert. Choose the elevation that fits your dates, prepare for colder nights, and you can trade summer crowds and heat for crisp air, changing leaves, and a quieter camp.

Choosing the Right Frame and Suspension for a Sheep Camp

A sheep camp is only as capable as the running gear beneath it. The right setup depends on the camp’s loaded weight, intended travel speed, terrain, required ground clearance, and access to service—not on a single suspension feature.

Start with intended use and loaded weight

Sheep camps, range camps, and sheepherders wagons can serve very different jobs. A recreational camp that regularly travels on paved roads needs a different frame and running-gear strategy from an agricultural camp that moves primarily across fields, ranch roads, or open range.

Before choosing a suspension, estimate the camp’s actual ready-to-travel weight. Include water, fuel, batteries, appliances, tools, food, personal gear, and optional equipment. The builder should then verify the complete trailer’s weight rating, axle capacity, tire and wheel ratings, braking requirements, hitch load, and fore-and-aft weight distribution as one system.

Understand the main suspension options

Leaf-spring suspension

Leaf springs remain common on camp trailers because the design is proven, familiar to service shops, and available in many capacities. Double-eye springs attach at both ends through hangers and shackles. Slipper springs have an eye at one end while the other end slides against a hanger or equalizer.

On many tandem leaf-spring systems, an equalizer helps transfer momentary loads between the axles as the trailer crosses uneven ground. Wear components such as bushings, shackles, bolts, U-bolts, and spring leaves can be inspected and replaced individually.

  • Advantages: broad parts availability, straightforward inspection, serviceable components, and many capacity choices.
  • Considerations: more exposed wear points and a need for regular inspection, lubrication where specified, and fastener checks.

Rubber torsion axles

A rubber torsion axle, such as Dexter’s Torflex design, contains the suspension inside the axle tube. Rubber cords surround an inner steel bar, allowing each torsion arm to react independently. The rubber cushioning eliminates spring-to-spring metal contact and can provide a smooth, quiet ride.

The suspension itself has few routine service points. Mounting fasteners still require inspection, and the brakes, bearings, hubs, seals, wheels, and tires retain their normal maintenance schedules. If the internal torsion components are damaged or worn, service commonly involves replacing the axle assembly rather than rebuilding an external spring pack.

  • Advantages: compact construction, independent wheel movement, quiet operation, and limited suspension maintenance.
  • Considerations: axle replacement can be more involved, and the axle’s starting angle, bracket position, capacity, and frame integration must be specified correctly.

Axle-less rubber suspension

An axle-less system is not simply another torsion axle. Timbren’s design mounts a separate suspension assembly at each side of the trailer and uses two rubber springs—one for jounce and one for rebound—with a control arm. Because there is no through axle, the system can increase ground clearance and allow each wheel to move independently.

That makes axle-less suspension attractive for some off-road and custom builds. Correct frame reinforcement, alignment, capacity selection, installation, and brake configuration remain essential. Service procedures also depend on the exact model, so the manufacturer’s instructions should guide inspection and maintenance.

  • Advantages: high ground clearance, independent wheel movement, modular installation, and configurations designed for off-road use.
  • Considerations: higher component cost than many conventional leaf-spring systems and greater sensitivity to correct frame preparation and installation.

Match the frame layout to the job

Tandem-axle frame

Many recreational range camps use a conventional tandem-axle frame. When the axles, hitch, brakes, tires, and load distribution are properly specified, a tandem layout can provide predictable highway handling, useful load capacity, and straightforward backing compared with wagon-style steering arrangements.

A tandem trailer places load on the hitch and must be moved with a suitable tow vehicle. Its rear axle also follows a tighter path through a turn than the tow vehicle, so drivers must allow for off-tracking around gates, rocks, trees, and narrow corners.

Front-dolly or fifth-wheel-plate wagon

Traditional agricultural camps often use a steerable front dolly and a fixed rear axle. This wagon-style arrangement avoids conventional tongue weight and can follow the tow vehicle’s path closely at low speed. Its simple construction suits field and ranch work.

Wagon-style steering is difficult to reverse and should not be assumed suitable for highway travel. Maximum speed, brake equipment, coupler design, lighting, and legal road use depend on the specific build and applicable regulations.

Tie-rod steering

A tie-rod system steers the front wheels through linked steering components rather than rotating the complete front axle assembly. It can make low-speed positioning easier than a basic dolly arrangement while preserving the tracking characteristics valued in agricultural use.

It remains a specialized design. Steering geometry, stops, coupler movement, braking, load capacity, and travel speed should be engineered for the intended application rather than inferred from appearance alone.

Questions to answer before the build begins

  1. Where will the camp travel? Distinguish regular highway use from forest roads, ranch roads, fields, and open range.
  2. What will it weigh when fully equipped? Include every tank, power system, appliance, supply, and option.
  3. How much ground clearance is actually needed? More clearance can affect entry height, center of gravity, and frame design.
  4. How will the camp be maneuvered? Consider backing, tight gates, uneven sites, and the available tow vehicle.
  5. Where will it be serviced? Parts availability and repair access may matter as much as initial ride quality.
  6. What inspections will the owner perform? No running gear is maintenance-free as a complete system; brakes, bearings, wheels, tires, fasteners, and suspension components all need attention.

Build the complete system around the route

Frame and suspension decisions belong near the beginning of a custom camp build. Once the intended use and loaded weight are clear, the frame, running gear, brakes, hitch, tires, layout, and equipment can be specified to work together.

Peak Outdoors can help compare the available configurations and identify the questions that should be resolved before fabrication. Final component selection should always follow the current specifications and installation requirements from the frame, axle, suspension, brake, wheel, and tire manufacturers.

RV Inverters Explained: What They Power and How to Choose One

An inverter can make an RV more capable away from shore power, but it is only one part of the electrical system. Choosing the right one starts with understanding what it does, which appliances you expect it to run, and whether the battery bank and wiring can support those loads.

A larger inverter does not automatically create more usable energy. It can deliver more power at one time, but the batteries determine how long that power is available. A well-designed system balances the inverter, battery capacity, charging sources, cables, protection devices, and the owner’s actual energy use.

What an RV inverter does

An inverter converts direct-current power from the RV battery bank into alternating-current power for equipment designed to use a household-style outlet. That can include a laptop charger, television, microwave, coffee maker, or other 120-volt appliance, depending on the system.

Many RV loads already operate directly from the 12-volt DC system. Lights, water pumps, control boards, and some fans may not need an inverter at all. Running a DC load directly is usually simpler because it avoids the conversion losses and idle consumption of an inverter.

Inverter, converter, and inverter/charger are different

The similar names can be confusing:

  • Inverter: Converts battery DC power into AC power for outlets and appliances.
  • Converter or charger: Uses shore or generator AC power to supply DC loads and charge the battery bank.
  • Inverter/charger: Combines both functions and often includes an automatic transfer feature.

Solar panels do not replace the inverter. A solar charge controller manages energy from the panels and charges the batteries; the inverter then draws from the battery bank when AC power is needed. Each component must be compatible with the system voltage and expected current.

Do you need an inverter?

You may not need one if you camp primarily with shore power, use a generator whenever AC power is required, or rely almost entirely on 12-volt equipment. A small portable inverter may be enough for occasional low-power electronics.

A permanently installed inverter becomes more useful when you want quiet AC power during travel or boondocking, need selected outlets available without starting a generator, or are building a larger battery-and-solar system. The right answer depends on the loads—not simply the size of the RV.

Start with the appliances you plan to run

List every AC device you expect to use away from shore power. Record its running wattage and note whether it has a motor, compressor, heating element, or other high-starting load. Then estimate which devices may operate at the same time.

The inverter’s continuous rating must cover the combined running load. Its short-duration surge rating must also handle startup demands. Refrigerators, air conditioners, pumps, power tools, and other motor-driven equipment can briefly draw substantially more power when starting than while running. Always use the appliance specifications and the inverter manufacturer’s ratings rather than relying on a generic rule.

Loads that deserve extra attention

  • Microwaves and coffee makers
  • Hair dryers, toasters, and electric heaters
  • Air conditioners and refrigerators with compressors
  • Power tools and other motor-driven equipment
  • Medical equipment or electronics that require dependable waveform quality

Heating appliances can consume a large amount of battery energy even when the inverter is capable of starting them. A device that works for a few minutes may still be impractical to run for a long period.

Size the battery bank as carefully as the inverter

Inverter wattage describes how much AC power can be delivered, not how long the batteries will last. Runtime depends on the load, battery-bank energy, usable depth of discharge, temperature, inverter efficiency, cable losses, and the battery manufacturer’s limits.

For perspective, a 1,000-watt AC load requires roughly 83 amps from a 12-volt battery system before accounting for inverter losses. A 2,000-watt load is roughly double that. High DC current demands suitable batteries, short cable runs, properly sized conductors, correct terminals, and appropriate overcurrent protection.

Estimate daily energy in watt-hours: multiply each device’s watts by the hours you expect to use it, then add the totals. Account for conversion losses and preserve the battery manufacturer’s recommended reserve. The battery bank must also be able to deliver the inverter’s continuous and surge current without excessive voltage drop.

Pure sine wave or modified sine wave?

A pure sine wave inverter produces power that more closely matches utility power and is the safer general-purpose choice for a mixed RV system. It is commonly preferred for sensitive electronics, variable-speed equipment, audio devices, and motor-driven loads.

A modified sine wave inverter may operate simple resistive loads, but some equipment can run hotter, noisier, less efficiently, or not at all. Compatibility depends on the specific device. Do not assume that every appliance will tolerate a modified waveform; follow the appliance manufacturer’s requirements.

Decide which circuits should receive inverter power

An inverter does not automatically energize every outlet in the RV. A small unit may power only its built-in receptacles. A hardwired system may feed a dedicated subpanel or selected branch circuits through an appropriate transfer arrangement.

Planning selected circuits prevents high-demand equipment—such as an electric water heater or air conditioner—from being connected unintentionally. It also makes energy use easier to understand. The transfer equipment, grounding arrangement, neutral bonding, GFCI protection, and overcurrent protection must match the inverter instructions and applicable RV electrical requirements.

Installation is part of system sizing

High-power inverters can draw hundreds of amps on the DC side. Undersized cables, long cable runs, loose connections, missing fuses, poor ventilation, or incorrect grounding can create voltage drop, nuisance shutdowns, heat, and fire risk.

Install the inverter in a dry, protected, ventilated location that meets the manufacturer’s clearance requirements. Keep DC cable runs as short as practical, use the specified conductor size and protection, and follow battery and inverter instructions exactly. A permanently wired inverter or inverter/charger should be designed and installed by a qualified RV electrical technician.

Plan the whole system: The inverter must handle continuous and startup loads, while the battery bank must support the required continuous and surge DC current. Manufacturer specifications and installation manuals control. Victron’s inverter/charger selection guidance provides a useful overview of load, surge, battery, and system-voltage considerations.

Questions to answer before choosing

  • Which AC devices must operate away from shore power?
  • What is their combined running wattage and highest startup surge?
  • How many watt-hours will they use during a typical day?
  • Can the battery bank safely provide that energy and current?
  • How will the batteries be recharged by shore power, the tow vehicle, solar, or a generator?
  • Which outlets or circuits should receive inverter power?
  • Does the installation require a transfer switch or inverter/charger?

Choose the system around how you camp

A modest inverter can be a practical way to charge electronics and run small AC devices. A larger inverter can support more demanding appliances, but only when paired with enough battery capacity, charging capability, wiring, and protection.

Start with the equipment you genuinely need, calculate its energy use, and design the entire electrical system around that demand. That approach produces a safer, more reliable off-grid setup than choosing the largest inverter that will fit.